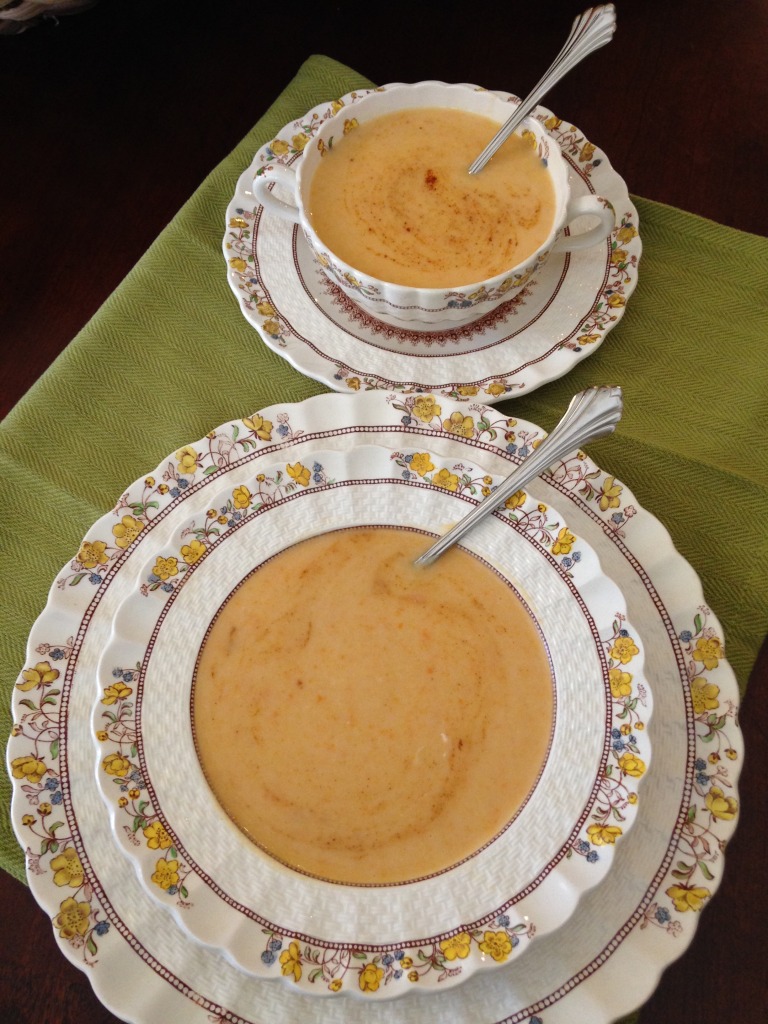
Yellow Squash Soup

 Usually I think of yellow squash in the summer, but I also think about them when there is a hint of fall in the air and knowing winter is right on its heels.  I always start making soup and chill.  This soup is so easy and so delicious.  Last week I shared a post about a Breast Cancer Luncheon that my best friend Marcy and I hosted.   We served this soup with cheese straws on the side.  It was a big hit and so many wanted the recipe I thought I really should put it on the blog.  So here you go!!!  We also make this for 65 people for our Celebration Dinner for Apples of Gold.  So it works great to double or triple the recipe.  We have people tell us they don’t like squash but they really like this soup.  So make it and they will eat it!!!  If you are like me you are watching what you eat and trying to make some of your tried and true recipes more healthy.  I used coconut milk instead of whipping cream and saved a lot of fat. It did not change the texture or the taste.  You can also adjust the Cayenne pepper to your taste.  If you like it spicy/hot add more but remember you will be adding some paprika on the top.  I hope you will make this “warm me up” Yellow Squash Soup and make an extra batch to bring joy to someone you know.

Yellow Squash Soup

Servings: 10
Course: Soup

Ingredients
  

  • 1 stick butter
  • 1 large onion chopped
  • 2 medium baking potatoes, peeled and sliced
  • 2 carrots sliced, I used 2 cups pre-cut carrots
  • 4 cups yellow squash sliced, about 8 squash
  • 3 tablespoons flour
  • 3 cups chicken broth
  • salt and pepper to taste
  • 1/4 teaspoon red (cayenne) pepper or to taste
  • 1 cup whipping cream, or 1 can coconut milk
  • 1/2 teaspoon nutmeg
  • Paprika for garnish

Method
 

  1. In a 4-quart saucepan, melt butter
  2. Add onion, sauté until wilted and transparent, about 5 minutes
  3. Add potatoes, carrots and squash; toss to coat with butter
  4. Add flour all at once; stir to combine
  5. Cook over medium heat 3-4 minutes, stirring
  6. Slowly stir in broth
  7. Season to taste with salt and cayenne pepper
  8. Cover, cook until all vegetables are fork tender, about 45 minutes
  9. Puree soup in batches in blender, food processor or with immersion hand blender in the pot
  10. When all soup has been pureed, return to soup pot
  11. Stir in cream or coconut milk. Taste for seasonings, adjust if necessary
  12. Heat through
  13. Stir in nutmeg; cook 3 to 4 minutes
To Serve
  1. Ladle hot soup in bowls. Sprinkle paprika onto top of soup and use a spoon to gently stir through soup creating an attractive marble patter,

Notes

To Store:  Soup base (before cream is added)  may be pureed, cooled and frozen up to 1 month.  Thaw base in refrigerator, bring to boil.  Reduce heat, add cream.  Enjoy!

Steps For Chopping An Onion

Steps For Chopping An Onion

Chopping an Onion 101  

When you learn this technique you will never dread chopping an onion again. The worst part will be the smell on your hands.

Tidbit Tip – Soap up your hands and rub them over a stainless steel sink or stainless steel bar the odor will be gone.  This tip works for all odors give it a try!!!

The Blossom end of the onion and a sharp knife

The Blossom end of the onion and a sharp knife

Step 1:  Cut off the Blossom End to make a flat surface for the next step.

Step 1: Cut off the Blossom End to make a flat surface for the next step.

Step 2:  Place the onion flat side down and cut in half.  I like to think of this end as the end looking like hair.  One end the Blossom, One end the Hair.

Step 2: Place the onion flat side down and cut in half. I like to think of this end as the end looking like hair. One end the Blossom, One end the Hair.

Step 3:  Cut the onion in half and peel.

Step 3: Cut the onion in half and peel.

Step 4:  Place the onion flat side down and cut starting in the middle down the onion moving over to make the next cut till you have cut across the entire onion.  Be careful not to cut through the end.  You want it intact to hold the onion together for the next step.  The wider the cuts the larger the size of your onion pieces will be.  The closer the cuts the smaller the pieces.  The next picture will show cuts all the way across and down the sides.

Step 4: Place the onion flat side down and cut starting in the middle down the onion moving over to make the next cut till you have cut across the entire onion. Be careful not to cut through the end. You want it intact to hold the onion together for the next step. The wider the cuts the larger the size of your onion pieces will be. The closer the cuts the smaller the pieces. The next picture will show cuts all the way across and down the sides.

Picture of the cuts made across entire onion.

Picture of the cuts made across entire onion.

Step 5:  Cut down through the cuts; again the closer you cut to the edge the smaller the pieces will be.

Step 5: Cut down through the cuts; again the closer you cut to the edge the smaller the pieces will be.

Picture of our chopped onion.   Tidbit Tip:  If a recipe calls for 1 cup of chopped onions you would chop the onion and then measure a cup.  If the recipe calls for one onion chopped you would chop the onion and use the entire onion.  The recipe will usually say what size onion to use like small, medium or large.

Picture of our chopped onion. Tidbit Tip: If a recipe calls for 1 cup of chopped onions you would chop the onion and then measure a cup. If the recipe calls for one onion chopped you would chop the onion and use the entire onion. The recipe will usually say what size onion to use like small, medium or large.